Astro 구조 및 사용법
Astro 체험기
who: Alex
Astro의 디렉토리 구조와 파일들

위를 보면 공홈의 디렉토리 구조이고 일반적인 nextjs, nuxtjs를 사용해 봤다면 얼추 비슷하다.
- public 폴더에 static 파일들을 넣는 구조도 동일.
- src 폴더가 실제 개발 코드가 있는 것도 동일
- (src 폴더 안) components 폴더에 react와 같이 재사용 가능한 UI 구성요소들을 저장.
- (src 폴더 안) layouts 폴더에 nextjs, nuxtjs처럼 레이아웃 관련 정의들을 저장.
- (src 폴더 안) pages 폴더에 싸이트에서 nextjs, nuxtjs처럼 페이지들을 저장하고 폴더와 파일이름이 라우팅 주소가 됨.
- astro.config.js 는 astro 프로젝트의 공통 config 파일로서 아무 설명이 없다면 default config로 export 되는데 상세한 configuration을 option을 알고 싶다면 이곳을 참조!
간단한 구조이면서 커스텀도 가능하고 여러 라이브러리를 도입해 사용할 수 있는 자유도도 있음.
Components
astro의 구문은 HTML, JSX 작성을 해봤다면 친숙하도록 설계 됨.
basic
예를 들면 astro 문법은 아래와 같다.
---
import Button from './Button.astro';
---

<div>
  <button title="Button 1" />
  <button title="Button 2" />
  <button title="Button 3" />
</div>
javascript를 --- 사이에 작성하고 아래 html + jsx를 작성한다.
astro 간 props 전달
astro 간 사용 방법은 아래와 같다.
---
// Usage: <GreetingHeadline greeting="Howdy" name="Partner" />
const { greeting, name } = Astro.props;
---
<h2>{greeting}, {name}!</h2>
---
import GreetingHeadline from './GreetingHeadline.astro';
const name = "Astro"
---
<h1>Greeting Card</h1>
<GreetingHeadline greeting="Hi" name={name} />
<p>I hope you have a wonderful day!</p>
간단하게 props를 넘겨받을 수 있다.
하위 요소 정의 slot
slot은 HTML 에서 하위 자식 컴포넌트들의 렌더링 장소를 정의하기 위해 사용. 사용 방법은 아래와 같음.
---
import Header from './Header.astro';
import Logo from './Logo.astro';
import Footer from './Footer.astro';

const { title } = Astro.props
---
<div id="content-wrapper">
  <Header />
  <Logo />
  <h1>{title}</h1>
  <slot />  <!-- children will go here -->
  <Footer />
</div>
---
import Wrapper from '../components/Wrapper.astro';
---
<Wrapper title="Fred's Page">
  <h2>All about Fred</h2>
  <p>Here is some stuff about Fred.</p>
</Wrapper>
심지어 슬롯에 이름을 지정해서 원하는 위치에 슬롯 끼워넣음.
---
import Header from './Header.astro';
import Logo from './Logo.astro';
import Footer from './Footer.astro';

const { title } = Astro.props
---
<div id="content-wrapper">
  <Header />
  <slot name="after-header"/>  <!--  children with the `slot="after-header"` attribute will go here -->
  <Logo />
  <h1>{title}</h1>
  <slot />  <!--  children without a `slot`, or with `slot="default"` attribute will go here -->
  <Footer />
  <slot name="after-footer"/>  <!--  children with the `slot="after-footer"` attribute will go here -->
</div>
---
import Wrapper from '../components/Wrapper.astro';
---
<Wrapper title="Fred's Page">
  <img src="https://my.photo/fred.jpg" slot="after-header">
  <h2>All about Fred</h2>
  <p>Here is some stuff about Fred.</p>
  <p slot="after-footer">Copyright 2022</p>
</Wrapper>
스타일 설정
스타일은 HTML에서 설정하듯 <style></style> 태그 안에 넣어 작성하면 됨.
Pages
pages 폴더 안의 구조는 routing을 다루고 데이터 로딩, 그리고 웹싸이트의 레이아웃도 다룸.
폭 넓은 코드 확장자 지원하는데 .astro, .md, .mdx(with mdx integration), .html, .js, .ts를 지원한다.
Layouts
레이아웃은 페이지에서 기본적으로 갖췄으면 하는 반복되는 구조(예를 들면 헤더나 푸터)를 먼저 정의해 놓고 이를 페이지에서 가져가 쉽게 적용하기 위해 사용.
astro 파일의 레이아웃 적용
---
import BaseHead from '../components/BaseHead.astro';
import Footer from '../components/Footer.astro';
const { title } = Astro.props
---
<html lang="en">
  <head>
    <meta charset="utf-8">
    <meta name="viewport" content="width=device-width, initial-scale=1">
    <BaseHead title={title}/>
  </head>
  <body>
    <nav>
      <a href="#">Home</a>
      <a href="#">Posts</a>
      <a href="#">Contact</a>
    </nav>
    <h1>{title}</h1>
    <article>
      <slot /> <!-- your content is injected here -->
    </article>
    <Footer />
  </body>
</html>
---
import MySiteLayout from '../layouts/MySiteLayout.astro';
---
<MySiteLayout title="Home Page">
  <p>My page content, wrapped in a layout!</p>
</MySiteLayout>
MD/MDX 파일의 레이아웃 적용
---
layout: ../layouts/BaseLayout.astro
title: "Hello, World!"
author: "Matthew Phillips"
date: "09 Aug 2022"
---

All frontmatter properties are available as props to an Astro layout component.

The `layout` property is the only special one provided by Astro.

You can use it in both Markdown and MDX files located within `src/pages/`.
---
// 1. The frontmatter prop gives access to frontmatter and other data
const { frontmatter } = Astro.props;
---
<html>
  <head>
    <!-- Add other Head elements here, like styles and meta tags. -->
    <title>{frontmatter.title}</title>
  </head>
  <body>
    <!-- Add other UI components here, like common headers and footers. -->
    <h1>{frontmatter.title} by {frontmatter.author}</h1>
    <!-- 2. Rendered HTML will be passed into the default slot. -->
    <slot />
    <p>Written on: {frontmatter.date}</p>
  </body>
</html>
Static Routing
src/pages/index.astro        -> mysite.com/
src/pages/about.astro        -> mysite.com/about
src/pages/about/index.astro  -> mysite.com/about
src/pages/about/me.astro     -> mysite.com/about/me
src/pages/posts/1.md         -> mysite.com/posts/1
Dynamic Routing
// src/pages/dogs/[dog].astro
---
export function getStaticPaths() {
  return [
    {params: {dog: 'clifford'}},
    {params: {dog: 'rover'}},
    {params: {dog: 'spot'}},
  ];
}

const { dog } = Astro.params;
---
<div>Good dog, {dog}!</div>
// src/pages/[lang]-[version]/info.astro
---
export function getStaticPaths () {
 return [
    {params: {lang: 'en', version: 'v1'}},
    {params: {lang: 'fr', version: 'v2'}},
  ];
}

const { lang, version } = Astro.params;
---
Rest Parameters
// src/pages/sequences/[...path].astro
---
export function getStaticPaths() {
  return [
    {params: {path: 'one/two/three'}},
    {params: {path: 'four'}},
    {params: {path: undefined }}
  ]
}

const { path } = Astro.params;
---
Pagination
astro에서는 기본적으로 데이터가 많으면 이를 split 해주기 위한 paginate() function을 제공함.
아래와 같이 사용할 수 있고 각 페이지에 2개 아이템씩 보여주게 됨 👍
---
export async function getStaticPaths({ paginate }) {
  const astronautPages = [{
    astronaut: 'Neil Armstrong',
  }, {
    astronaut: 'Buzz Aldrin',
  }, {
    astronaut: 'Sally Ride',
  }, {
    astronaut: 'John Glenn',
  }];
  // Generate pages from our array of astronauts, with 2 to a page
  return paginate(astronautPages, { pageSize: 2 });
}
// All paginated data is passed on the "page" prop
const { page } = Astro.props;
---

<!--Display the current page number. Astro.params.page can also be used!-->
<h1>Page {page.currentPage}</h1>
<ul>
  <!--List the array of astronaut info-->
  {page.data.map(({ astronaut }) => <li>{astronaut}</li>)}
</ul>
API로 pagination을 구현 후 받을 때는 아래와 같이 받음.
// src/pages/astronauts/[page].astro
---
// Paginate same list of { astronaut } objects as the previous example
export async function getStaticPaths({ paginate }) { /* ... */ }
const { page } = Astro.props;
---
<h1>Page {page.currentPage}</h1>
<ul>
  {page.data.map(({ astronaut }) => <li>{astronaut}</li>)}
</ul>
{page.url.prev ? <a href={page.url.prev}>Previous</a> : null}
{page.url.next ? <a href={page.url.next}>Next</a> : null}
interface Page<T = any> {
  /** result */
  data: T[];
  /** metadata */
  /** the count of the first item on the page, starting from 0 */
  start: number;
  /** the count of the last item on the page, starting from 0 */
  end: number;
  /** total number of results */
  total: number;
  /** the current page number, starting from 1 */
  currentPage: number;
  /** number of items per page (default: 25) */
  size: number;
  /** number of last page */
  lastPage: number;
  url: {
    /** url of the current page */
    current: string;
    /** url of the previous page (if there is one) */
    prev: string | undefined;
    /** url of the next page (if there is one) */
    next: string | undefined;
  };
}
Excluding Pages
pages 폴더 안에 넣고 싶은데 Routing에는 관여하지 않게 하고 싶다!
그럴 때는 앞에 _ 를 prefix로 붙여주면 됨.
Imports
file in /public
static asset 파일의 경우 public 폴더에 두면 astro가 알아서 copy해서 최종 빌드에 둔다. public 폴더 안의 파일들은 astro의 번들과 빌드 방식을 따르지 않아서 어떤 파일이든 지원할 수 있다!
JS, TS, JSX, TSX
import { getUser } from "./user.js";
import { getUser } from "./user";
import type { UserType } from "./user";
import { MyComponent } from "./MyComponent.jsx";
import MyComponent from "./MyComponent"; // MyComponent.tsx
NPM packages
---
import { Icon } from 'astro-icon';
---
JSON, CSS, Other Assets
// Load the JSON object via the default export
import json from "./data.json";
import "./style.css";
import imgReference from "./image.png"; // imgReference === '/src/image.png'
import svgReference from "./image.svg"; // svgReference === '/src/image.svg'
import txtReference from "./words.txt"; // txtReference === '/src/words.txt'
// This example uses JSX, but you can use import references with any framework.
<img src={imgReference} alt="image description" />;
많은 파일 한번에 가져오기
---
// imports all files that end with `.md` in `./src/pages/post/`
const posts = await Astro.glob('../pages/post/*.md');
---
<!-- Renders an <article> for the first 5 blog posts -->
<div>
{posts.slice(0, 4).map((post) => (
  <article>
    <h2>{post.frontmatter.title}</h2>
    <p>{post.frontmatter.description}</p>
    <a href={post.url}>Read more</a>
  </article>
))}
</div>
위 방법을 이용해 모든 컴포넌트를 가져와 사용할 수도 있음.
패턴 예시 -> ./pages/**/*.{md,mdx}
---
// imports all files that end with `.astro` in `./src/components/`
const components = await Astro.glob('../components/*.astro');
---
<!-- Display all of our components -->
{components.map((component) => (
  <div>
    <component.default size={24} />
  </div>
))}
Endpoints
Static File Endpoints
파일을 웹에서 보여줄 때 아래와 같이 pages 폴더 내에 /builtwith.json url에서 볼 수 있도록 설정할 수 있음. 이미지의 경우는 encoding도 가능.
// src/pages/builtwith.json.ts
// Outputs: /builtwith.json
export async function get({ params, request }) {
  return {
    body: JSON.stringify({
      name: "Astro",
      url: "https://astro.build/",
    }),
  };
}

//src/pages/astro-logo.png.ts
export async function get({ params, request }) {
  const response = await fetch(
    "https://astro.build/assets/press/full-logo-light.png"
  );
  const buffer = Buffer.from(await response.arrayBuffer());
  return {
    body: buffer,
    encoding: "binary",
  };
}
Data Fetching
Astro는 기본적으로 global에 fetch() 기능이 선언되어 있어 바로 접근이 가능! 👍
애써 다른 모듈을 사용할 필요가 없음. 아래처럼 바로 사용해 데이터를 불러올 수 있음.
// src/components/User.astro
---
import Contact from '../components/Contact.jsx';
import Location from '../components/Location.astro';

const response = await fetch('https://randomuser.me/api/');
const data = await response.json();
const randomUser = data.results[0];
---
<!-- Data fetched at build can be rendered in HTML -->
<h1>User</h1>
<h2>{randomUser.name.first} {randomUser.name.last}</h2>

<!-- Data fetched at build can be passed to components as props -->
<Contact client:load email={randomUser.email} />
<Location city={randomUser.location.city} />
GraphQL Server로의 fetch도 가능!
src/components/Weather.astro
---
const response = await fetch("https://graphql-weather-api.herokuapp.com",
  {
    method: 'POST',
    headers: {'Content-Type':'application/json'},
    body: JSON.stringify({
      query: `
        query getWeather($name:String!) {
            getCityByName(name: $name){
              name
              country
              weather {
                summary {
                    description
                }
              }
            }
          }
        `,
      variables: {
          name: "Toronto",
      },
    }),
  });

const json = await response.json();
const weather = json.data;
---
<h1>Fetching Weather at build time</h1>
<h2>{weather.getCityByName.name}, {weather.getCityByName.country}</h2>
<p>Weather: {weather.getCityByName.weather.summary.description}</p>
DEPLOY
Astro를 배포하는 가이드는 아래와 같이 꽤 많은 싸이트에서 손쉽게 가능함.
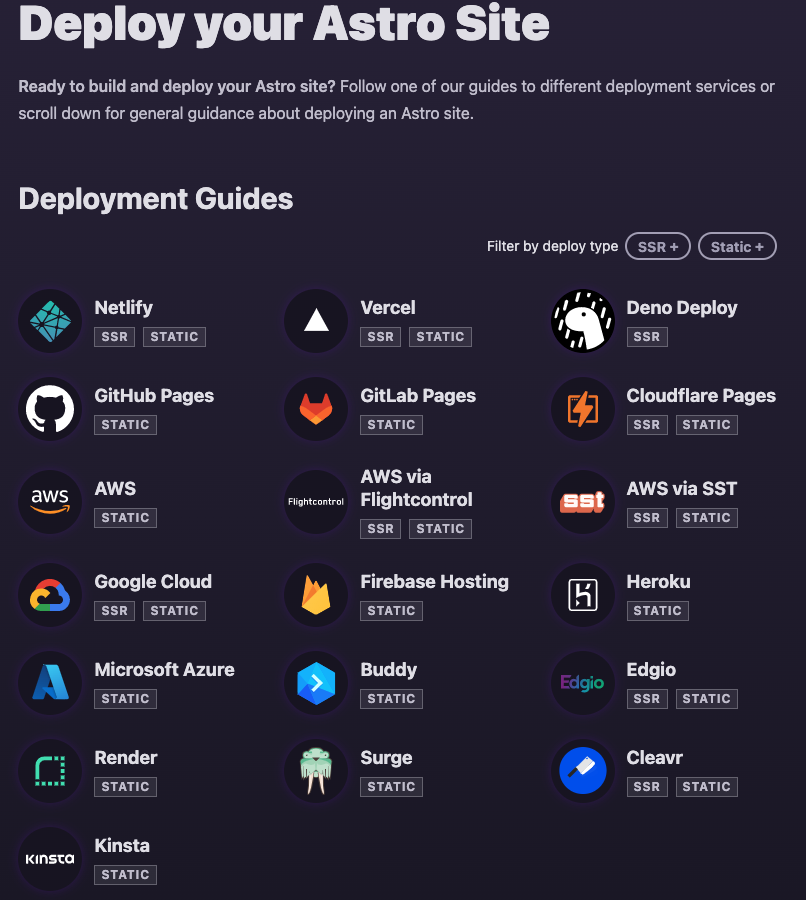
이 중 내가 자주 쓰는 Netlify 하나만 보면 아래와 같이 간단.
Netlify에 배포하는 방법은 static 싸이트로 배포하거나 SSR 싸이트로 배포하거나 edge-rendered 싸이트로 배포하거나 3가지가 가능함.
Static 싸이트는 아무런 셋팅 없이 바로 가능.
SSR, Edge의 경우 Adapter가 필요한데 셋팅 방법은 아주 간단.
npx astro add netlify 를 하면 바로 가능
또는 수작업으로 하고 싶으면 아래와 같이
npm install @astrojs/netlify
2-1. SSR의 경우
//astro.config.mjs;
import { defineConfig } from "astro/config";
import netlify from "@astrojs/netlify/functions";

export default defineConfig({
  output: "server",
  adapter: netlify(),
});
2-2. Edge의 경우
import { defineConfig } from "astro/config";
import netlify from "@astrojs/netlify/functions";
import netlify from "@astrojs/netlify/edge-functions";

export default defineConfig({
  output: "server",
  adapter: netlify(),
});
그럼 코드 상에서는 준비가 끝났고 Netlify에 접속해 대시보드에서 Add a new site 누르고 import an existing project를 통해 github연결하고
build command 를 astro build 나 npm run build로 입력한 뒤 publish directory를 dist로 설정한다.
만약 설정을 file로 저장해 자동으로 읽히게 하고 싶다면 netlify.toml 파일을 만들어 아래와 같이 저장해둬도 된다.
[build]
  command = "npm run build"
  publish = "dist"
그냥도 되지만 node version을 설정하고 싶다면 .nvmrc 파일을 만들어 아래 버전보다 상위버전으로 한다면 astro의 배포가 가능하다.
NODE_VERSION="16.12.0"