
2 posts tagged with "AWS"

View All Tags

Introducing Multy A Comprehensive Comparison with Terraform

· 4 min read
Alex Han
Software Engineer

image

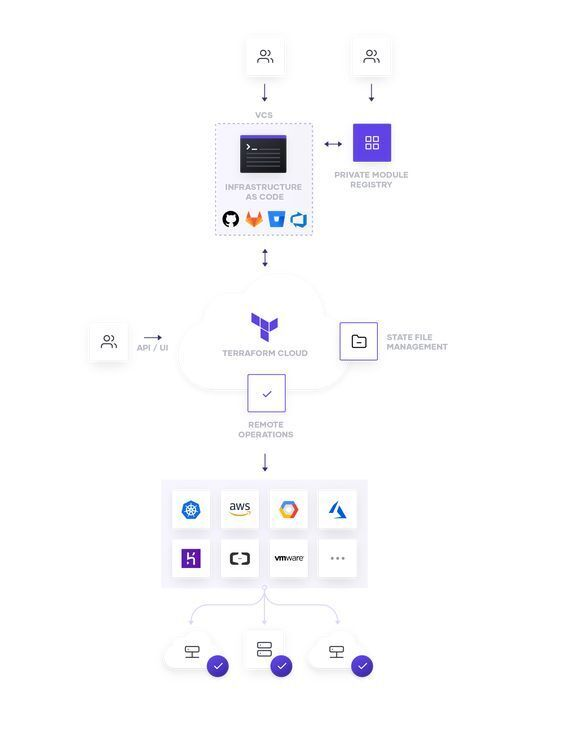
At the core of infrastructure as code (IaC) lies the concept of automating infrastructure management through code. Terraform, an open-source IaC tool, has gained immense popularity over the years due to its versatile capabilities, large provider ecosystem, and robust community support. But with the growing need for more efficient and flexible IaC tools, a new player has emerged in the field: Multy.

In this article, I will introduce Multy, discuss its features and advantages, and provide a comprehensive comparison with Terraform to help you decide which tool is best suited for your infrastructure management needs.

What is Multy and Why was it Created?

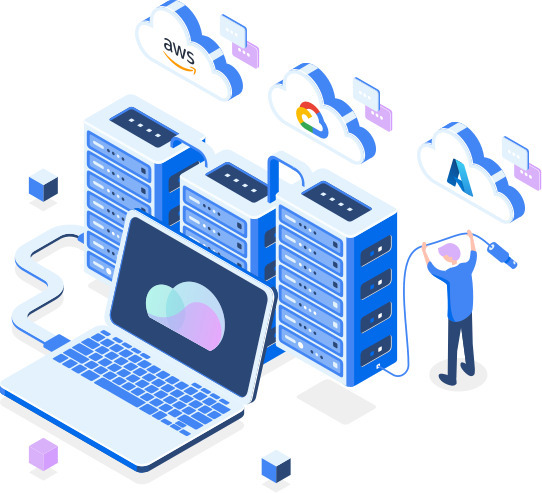
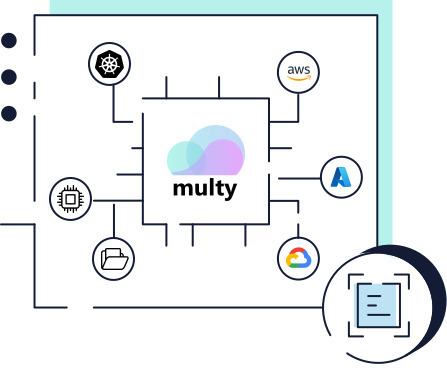
Multy is an open-source IaC tool that was created to provide a more flexible and efficient way of managing cloud infrastructure. It was designed to address some of the limitations of other popular IaC tools, such as Terraform. One of the main features of Multy is its ability to handle multiple cloud providers, such as AWS, Azure, and GCP, simultaneously. This means that users can manage cloud infrastructure across multiple providers using a single tool, which is a significant advantage over other tools that are limited to a single cloud provider.

Features of Multy

image2

Multy has several unique features that make it a powerful IaC tool. Here are some of its key features:

  1. Multi-Cloud Support - Multy can handle infrastructure across multiple cloud providers, which is a significant advantage over other tools that are limited to a single cloud provider.
  2. Plugin System - Multy has a plugin system that allows users to extend its functionality and customize it to meet their specific needs.
  3. Modular Design - Multy has a modular design, which makes it easy to manage infrastructure across multiple environments.
  4. Powerful Syntax - Multy's syntax is powerful and easy to use, which makes it easy to write and manage complex infrastructure code.
  5. Terraform Compatibility - Multy is compatible with Terraform, which means that users can use existing Terraform modules with Multy.
  6. Native Kubernetes Support - Multy has native support for Kubernetes, making it easier for users to manage their Kubernetes clusters and associated resources.
  7. Secure Remote State Management - Multy provides secure remote state management out of the box, ensuring that your infrastructure code is always up to date and secure.

Pros and Cons of Multy Compared to Terraform

Multy and Terraform are both powerful IaC tools, and each has its advantages and disadvantages. Here are some of the pros and cons of Multy compared to Terraform:

Pros of Multy

  1. Multi-Cloud Support - Multy can handle infrastructure across multiple cloud providers, which is a significant advantage over Terraform.
  2. Plugin System - Multy has a plugin system that allows users to extend its functionality and customize it to meet their specific needs.
  3. Modular Design - Multy has a modular design, which makes it easy to manage infrastructure across multiple environments.
  4. Powerful Syntax - Multy's syntax is powerful and easy to use, which makes it easy to write and manage complex infrastructure code.

Cons of Multy

  1. Limited Community Support - Multy is a relatively new tool, which means that it has a smaller community than Terraform, which can make it harder to find resources and support.
  2. Learning Curve - Multy's syntax and features can be challenging to learn, especially for beginners.
  3. Terraform Compatibility - While Multy is compatible with Terraform, there may be some differences in syntax and functionality between the two tools.

How to Use Multy

Using Multy is straightforward. Here's a step-by-step guide to get started with Multy:

  1. Install Multy: The first step is to install Multy on your local machine or server. You can find detailed instructions on how to install Multy in the official documentation.
  2. Create Your Multy Project: Once you have installed Multy, you can create your Multy project. A Multy project is a set of infrastructure resources that you want to manage using Multy. You can create a new project by running the following command:
  3. multy init
  4. Define Your Infrastructure Resources: After creating your Multy project, you need to define your infrastructure resources using the Multy DSL. Multy DSL is a simple language that enables you to define your infrastructure resources in a cloud-agnostic way.
  5. Apply Your Infrastructure Changes: Once you have defined your infrastructure resources, you can apply your changes to your infrastructure using the following command:
  6. multy apply

Conclusion

Multy is a promising alternative to Terraform that offers several unique features, including multi-cloud provider support, native Kubernetes support, and secure remote state management. While it has some limitations, it's worth exploring if you are looking for a cloud-agnostic IaC tool that can help you manage your infrastructure across multiple cloud providers.

Introduction to Terraform Simplify Your Infrastructure Management

· 6 min read
Alex Han
Software Engineer

image

As the world moves towards the cloud, managing infrastructure has become increasingly complex. Whether you're working with AWS, GCP, or Azure, the sheer number of services available can be overwhelming. Infrastructure management is no longer just about keeping the lights on; it's about keeping your applications running smoothly while keeping costs under control. Enter Terraform - an open-source infrastructure-as-code tool that simplifies infrastructure management.

What is Terraform?

Terraform is a tool that allows you to define your infrastructure as code. This means that instead of configuring your infrastructure manually, you can write code that describes the desired state of your infrastructure. Terraform then takes care of creating, updating, or deleting resources to make sure that your infrastructure matches the code you've written.

Why do you need Terraform?

image2

Terraform offers many benefits over manual infrastructure management. Firstly, it simplifies the process of defining your infrastructure. Instead of manually creating and configuring resources, you can use code to define your infrastructure. This makes it easier to create repeatable, predictable infrastructure that can be easily tested and modified.

Secondly, Terraform allows you to manage your infrastructure in a modular way. Instead of having to manage a monolithic infrastructure, you can break it down into smaller, more manageable components. This makes it easier to understand and modify your infrastructure.

Finally, Terraform makes it easier to manage infrastructure at scale. With Terraform, you can define your infrastructure in a way that makes it easy to replicate across multiple environments. This makes it easier to manage infrastructure across different regions, data centers, or cloud providers.

How to Install Terraform

Terraform can be installed on Windows, Mac, and Linux. The installation process is straightforward and can be completed in a few simple steps. To install Terraform, follow the instructions provided in the official Terraform documentation for your specific operating system.

Linux Installation

For Linux users, the easiest way to install Terraform is by using a package manager such as apt or yum. Here is an example of how to install Terraform on Ubuntu using apt.

sudo apt-get update
sudo apt-get install terraform

MacOS Installation

On MacOS, you can install Terraform using the popular package manager Homebrew

brew install terraform

Windows Installation

For Windows users, Terraform can be installed by downloading the appropriate executable file from the official Terraform website. Once downloaded, unzip the file and add the binary to your system's path.

Connecting to AWS, GCP, and Azure

Once Terraform is installed, you'll need to configure it to work with your cloud provider. This involves setting up credentials and configuring the provider settings. Again, the official Terraform documentation provides detailed instructions for each cloud provider.

AWS Connection

To connect to AWS, you need to have an AWS account and create an access key and secret key. Once you have those, add the following code to your Terraform configuration file:

provider "aws" {
region = "us-west-2"
access_key = "YOUR_ACCESS_KEY"
secret_key = "YOUR_SECRET_KEY"
}

Make sure to replace YOUR_ACCESS_KEY and YOUR_SECRET_KEY with your actual access key and secret key.

GCP Connection

To connect to GCP, you need to have a GCP account and create a service account key. Once you have that, add the following code to your Terraform configuration file:

provider "google" {
credentials = file("path/to/your/credentials.json")
project = "your-project-id"
region = "us-west1"
}

Make sure to replace path/to/your/credentials.json and your-project-id with the path to your credentials file and your actual GCP project ID.

Azure Connection

To connect to Azure, you need to have an Azure account and create a service principal. Once you have that, add the following code to your Terraform configuration file:

provider "azurerm" {
subscription_id = "YOUR_SUBSCRIPTION_ID"
client_id = "YOUR_CLIENT_ID"
client_secret = "YOUR_CLIENT_SECRET"
tenant_id = "YOUR_TENANT_ID"
}

Make sure to replace YOUR_SUBSCRIPTION_ID, YOUR_CLIENT_ID, YOUR_CLIENT_SECRET, and YOUR_TENANT_ID with your actual Azure subscription ID, client ID, client secret, and tenant ID.

Managing Infrastructure with Terraform

Now that you have Terraform installed and connected to your cloud provider, you can start managing infrastructure as code. Here are some examples of how to add, update, change, or remove real infrastructure using Terraform.

Adding, Updating, Changing, or Removing Real Infrastructure with Terraform

Let's look at how you can use Terraform to manage your infrastructure. In this example, I'll use AWS as our cloud provider.

  1. Define your infrastructure The first step is to define the infrastructure you want to create. In this example, I'll create an EC2 instance and an S3 bucket.
provider "aws" {
region = "us-west-2"
}

resource "aws_instance" "example" {
ami = "ami-0c55b159cbfafe1f0"
instance_type = "t2.micro"
}

resource "aws_s3_bucket" "example" {
bucket = "example-bucket"
}
  1. Initialize Terraform Next, I need to initialize Terraform by running the terraform init command. This will download the necessary providers and modules.

  2. Plan the changes I can now use the terraform plan command to preview the changes that Terraform will make to our infrastructure.

  3. Apply the changes Finally, I can apply the changes by running the terraform apply command. This will apply the Terraform configuration and creates the resources defined in the configuration.

  4. Update the Configuration If you want to change the configuration, you can update the Terraform configuration file and run terraform apply again. Terraform will automatically detect the changes and update the resources accordingly.

  5. Remove Resources If you want to remove the resources defined in the configuration, you can run terraform destroy. This will remove all resources defined in the Terraform configuration.

Conclusion

Infrastructure as code has become an essential part of modern software development, and Terraform is one of the most popular tools for managing infrastructure as code.

With Terraform, you can manage infrastructure across multiple cloud providers, define infrastructure in a declarative language, and version control your infrastructure. If you're not already using Terraform, I highly recommend that you give it a try.

In the next blog post, I will introduce Multy, a powerful tool for managing multiple Terraform workspaces. Stay tuned!